HardwareSoftware
A program for your exact board
Say what should happen ("when it is dark, turn on the light") and get the program for the controller and modules you wired, with their real pins and drivers. Upload it from the browser.
Hardware · Software · Algorithms · Mechanics · Assembly
Wire a controller and sensors, tune the image processing, model the enclosure around it and check the fit before you print or order anything. Each stage knows what the last one decided.
How it works
Change the electronics and the code and the enclosure follow. No re-typing board sizes, pin numbers or hole positions between tools.
HardwareSoftware
Say what should happen ("when it is dark, turn on the light") and get the program for the controller and modules you wired, with their real pins and drivers. Upload it from the browser.
HardwareMechanics
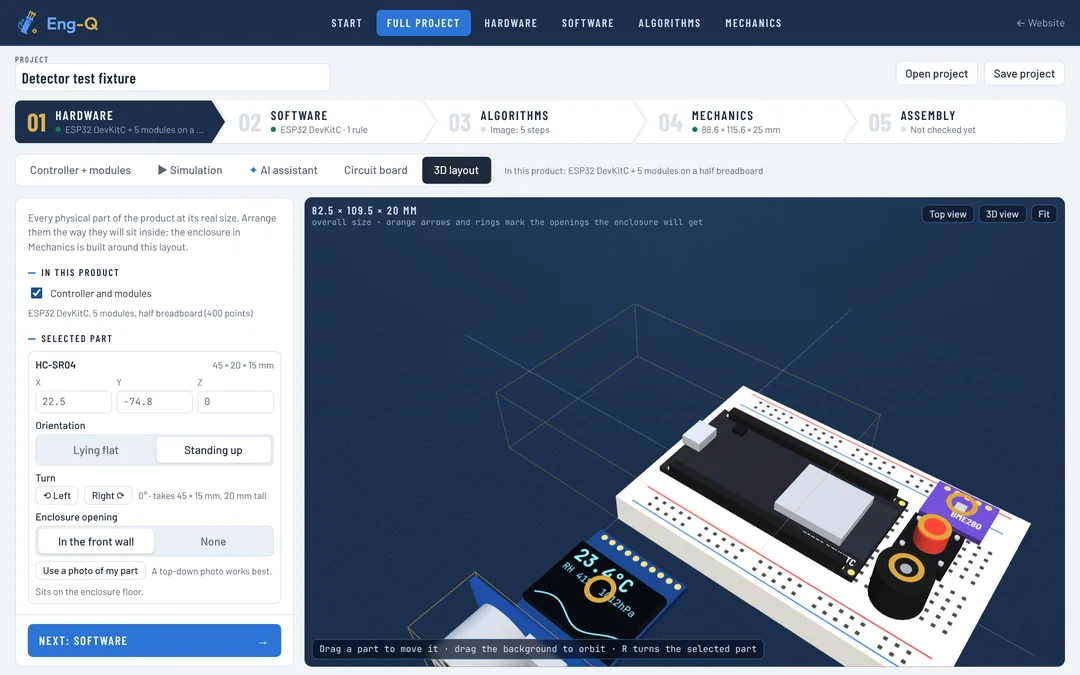
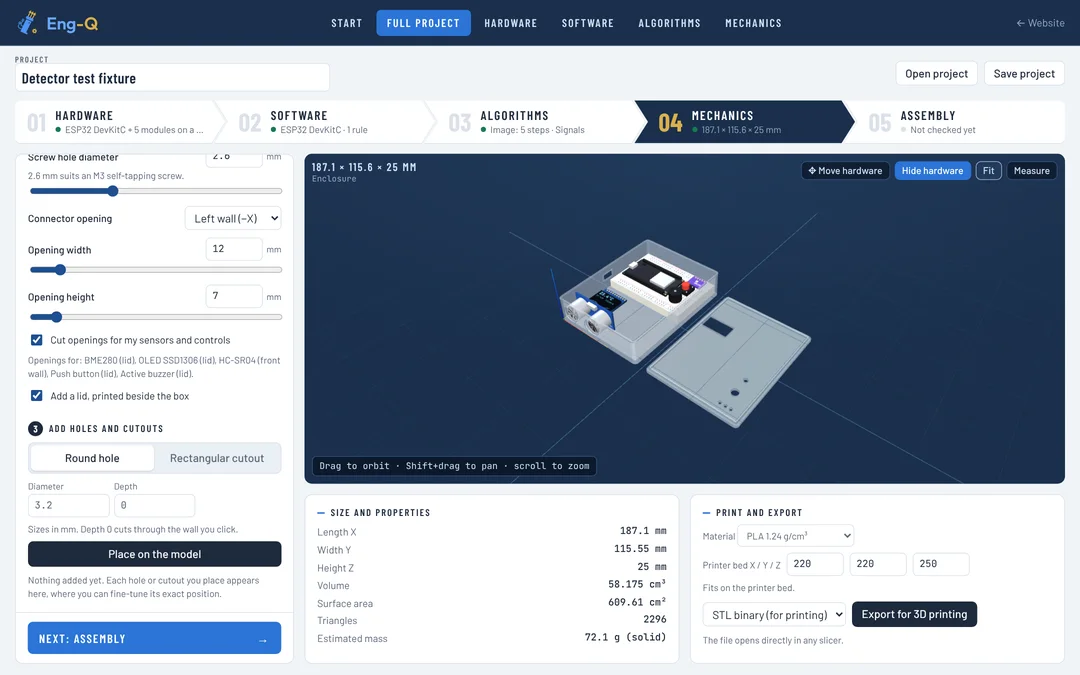
The box is built around the 3D layout of your parts: standoffs under the real mounting holes, and openings in the wall or lid exactly where each sensor, display and button sits.
MechanicsAssembly
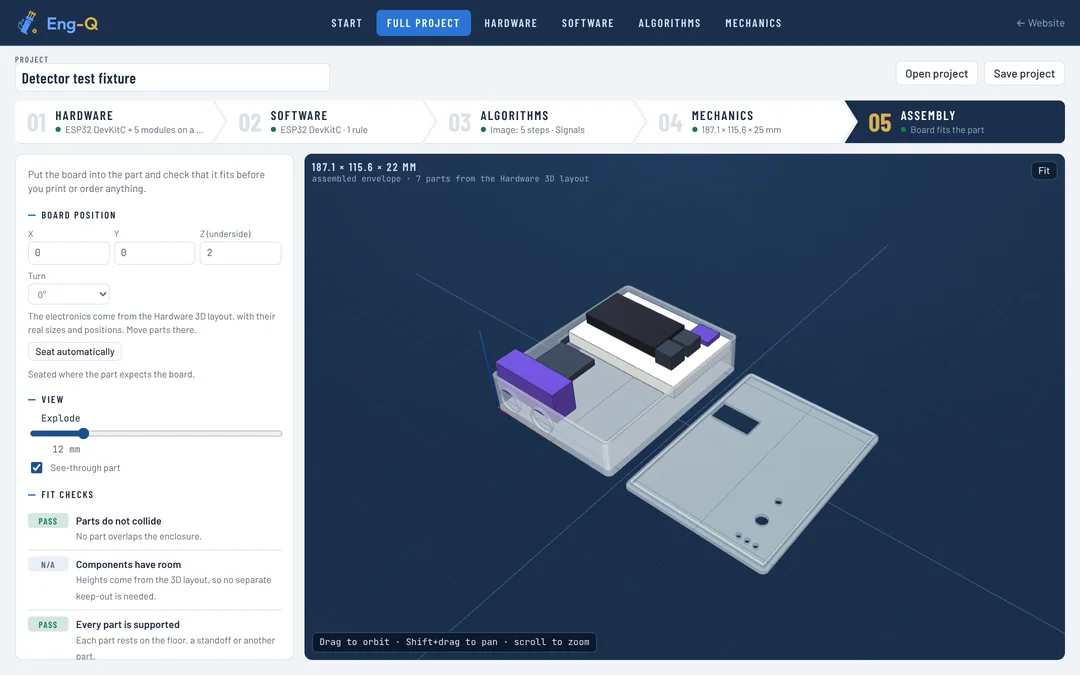
The board is seated in the part and tested for collisions, room for components, support underneath and a clear path for every screw.
The five stages
01
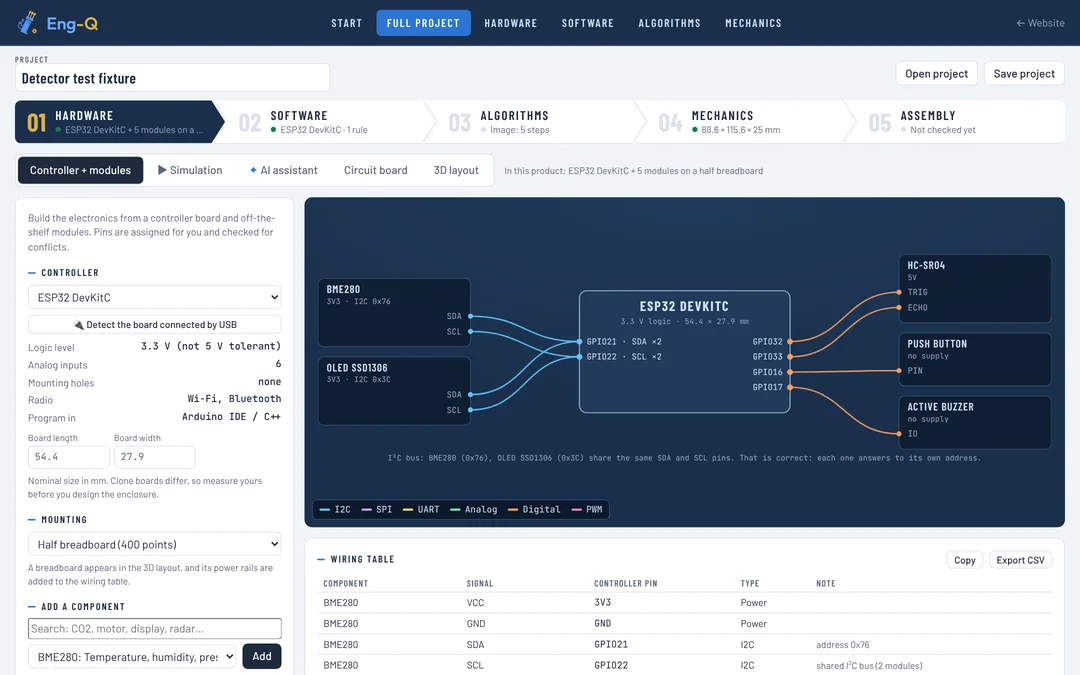
Build it from off-the-shelf boards and modules: 42 controllers and 130 parts, each with its real size and a 3D model.
02
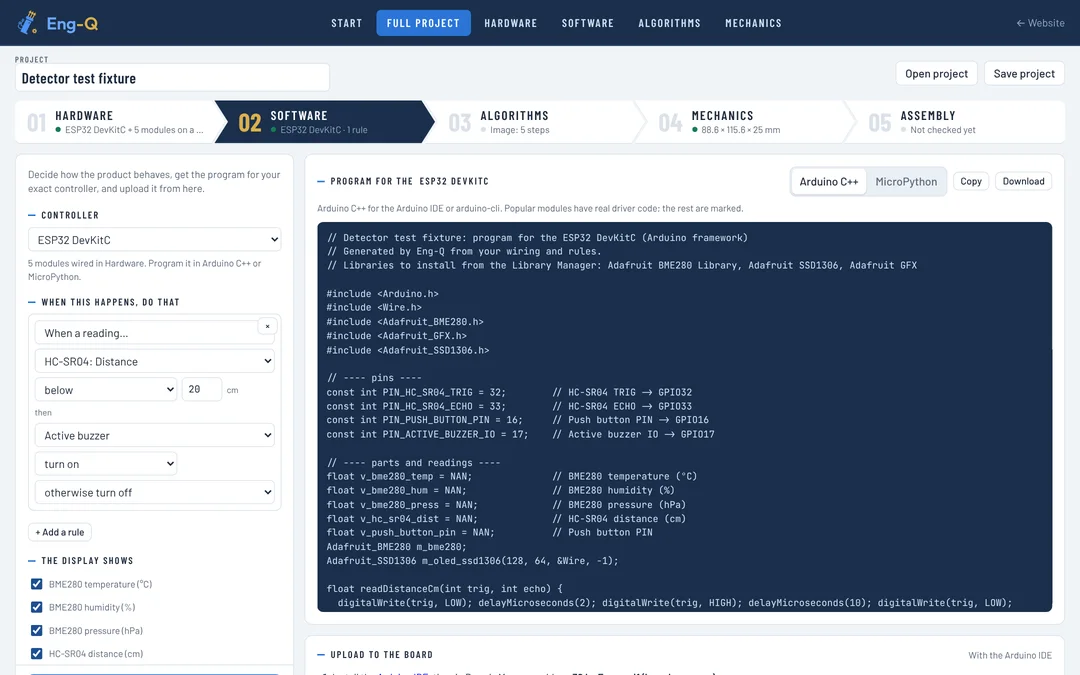
Decide how the product behaves, and get the program for your exact controller.
03
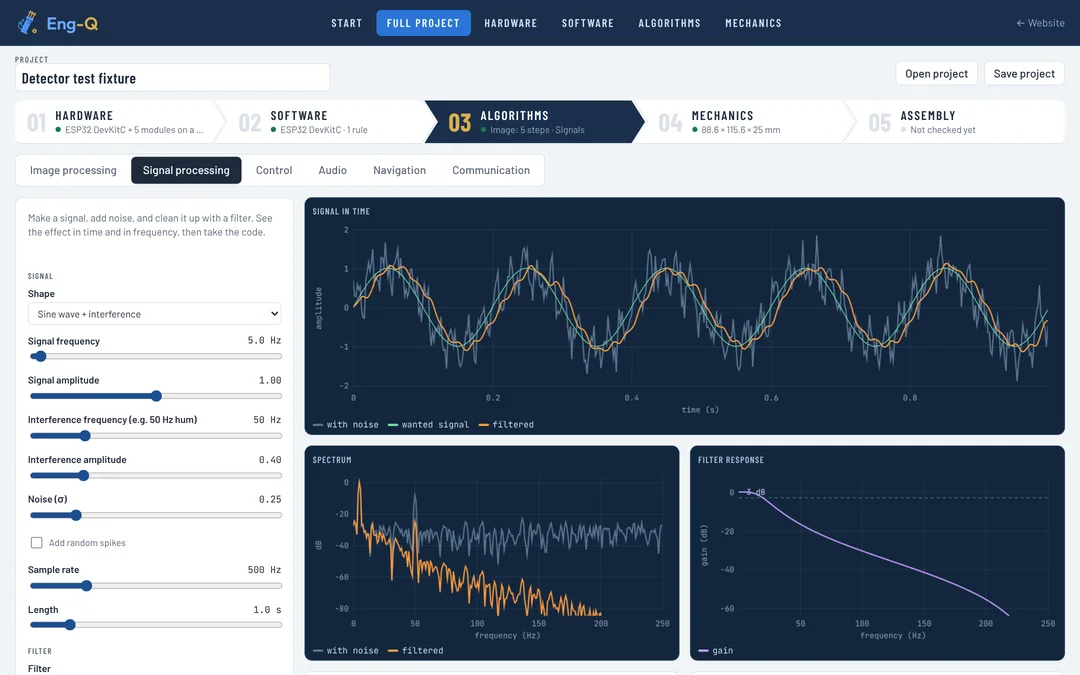
An interactive lab: change a value and see the result at once, then take the code.
04
Model the part without any CAD experience.
05
Put it together on screen first.
Who it's for
Single tools
Every stage also works on its own, with nothing tied to the other three.
Wire a controller and modules and walk away with a pin map, firmware, a 3D layout and a circuit board ready to order.
Open 02Pick a controller, set how it behaves, and get its program, uploaded straight to the board.
Open 03Experiment with image processing, signals, control, navigation and communication, and export the code.
Open 04Model any part from guided shapes, add holes with a click and export it for 3D printing.
OpenPrivate by design
Images, videos and models are processed inside your browser. Nothing is uploaded and there is no account to create. Save a project file whenever you want to pick up where you left off.
What you take away
Questions
Yes. Everything on the site is free to use, with no account, no plan and no limits. It runs in your browser, and your files stay on your computer.
No. Guided mode starts from ready-made parts and asks for a handful of sizes in plain words. You place holes and cutouts by clicking on the model. Advanced mode is there when you want full control.
Yes. Quick match picks a controller and modules from keywords in English or Hebrew, and the app then wires them. It is free and needs no account.
No. All processing runs in your browser on your own computer. Close the tab and nothing is left behind except the files you chose to save.
42 controllers: the Arduino family (Uno R3 and R4, Leonardo, Mega, Due, the Nano range, Micro, Pro Mini), ESP32, ESP32-S3, ESP32-C3, ESP32-CAM and ESP8266 boards, STM32 Blue Pill, Black Pill and Nucleo boards, Raspberry Pi Pico and Pico 2, Seeed XIAO, Teensy 4, and Raspberry Pi 5, 4, 3 and Zero 2 W. They come with 130 modules: environment and gas sensors, distance, radar and lidar, light and colour, motion and position, displays from OLED to e-paper, motor and stepper drivers, relays, radios (LoRa, nRF24, RFID, CAN, RS-485), clocks, audio and cameras. Every part has a 3D model at its real size. Board sizes are editable, because clone boards vary.
The image-processing code reproduces your pipeline exactly and runs as is with OpenCV or the MATLAB Image Processing Toolbox. The firmware sets up every pin, checks the I2C devices, reads simple sensors and listens for output commands. Drivers for the more complex sensors are marked as TODOs with a suggested library.
Yes. Save project writes a single file with the hardware, the pipeline, the part and the assembly. Open it again to carry on exactly where you stopped.
Start with the sample project and change it into yours.